
Unlocking the Perfect Push-Up
By Tony D’Ovidio PT, DPT, OCS, MTC | Therapydia Portland
Push-ups are one of the best, most accessible ways to train the upper body. They take no equipment and can be progressed and regressed easily for people of any fitness level. It’s a shame, then, that so many people can’t perform a solid push-up either due to lack of strength or lack of skill. We’re going to fix both problems today by breaking down perfect push-up technique into 5 easy steps, with ideas for correcting common issues people experience.
Body position
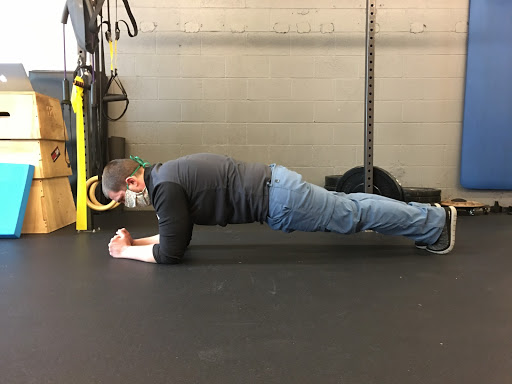
This is fundamental to performing a good push-up, and it’s an area that most people struggle with. The push-up is ideally performed in a posterior pelvic tilt – this means the low back should look flat when viewed from the side, not arched with the belly sagging towards the ground. When you’re in the top of a push-up, make sure to draw the belly button in towards your spine and away from the ground. At the same time, make sure to squeeze your butt forcefully. This will assure the proper position of the pelvis and the low back, which makes the whole exercise much cleaner and easier.
If you’re having difficulty maintaining a good position, there’s usually two main issues. First is that the muscles of your hips and spine are not strong enough to hold your body in the correct position. If this is the case, you can train them using planks. Hold for time until you can build up to 45-60 seconds, at which point you should be able to do push-ups with a good spinal position. The second common issue is that your chest might not be strong enough. Why would a weak chest cause the back to round? It’s generally easier to do a push down than straight ahead, and by changing the orientation of the chest and arms to point down we have to compensate by arching the lower back. Changing the body position like this also has the advantage of limiting the range of motion of the exercise, making it easier still. If this is the problem, you may have to work on the incline push-up described later in the article.
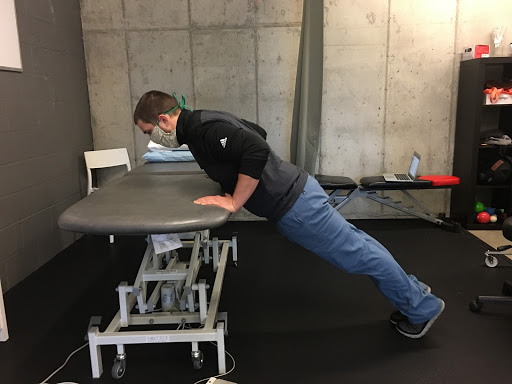
Hand position
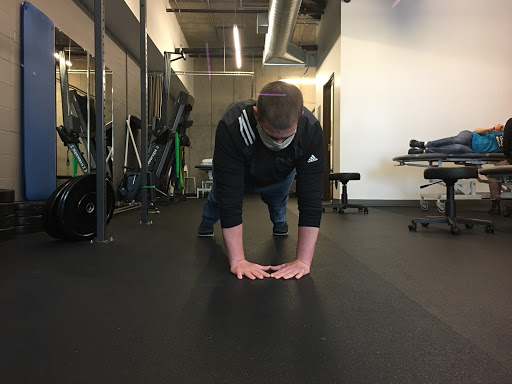
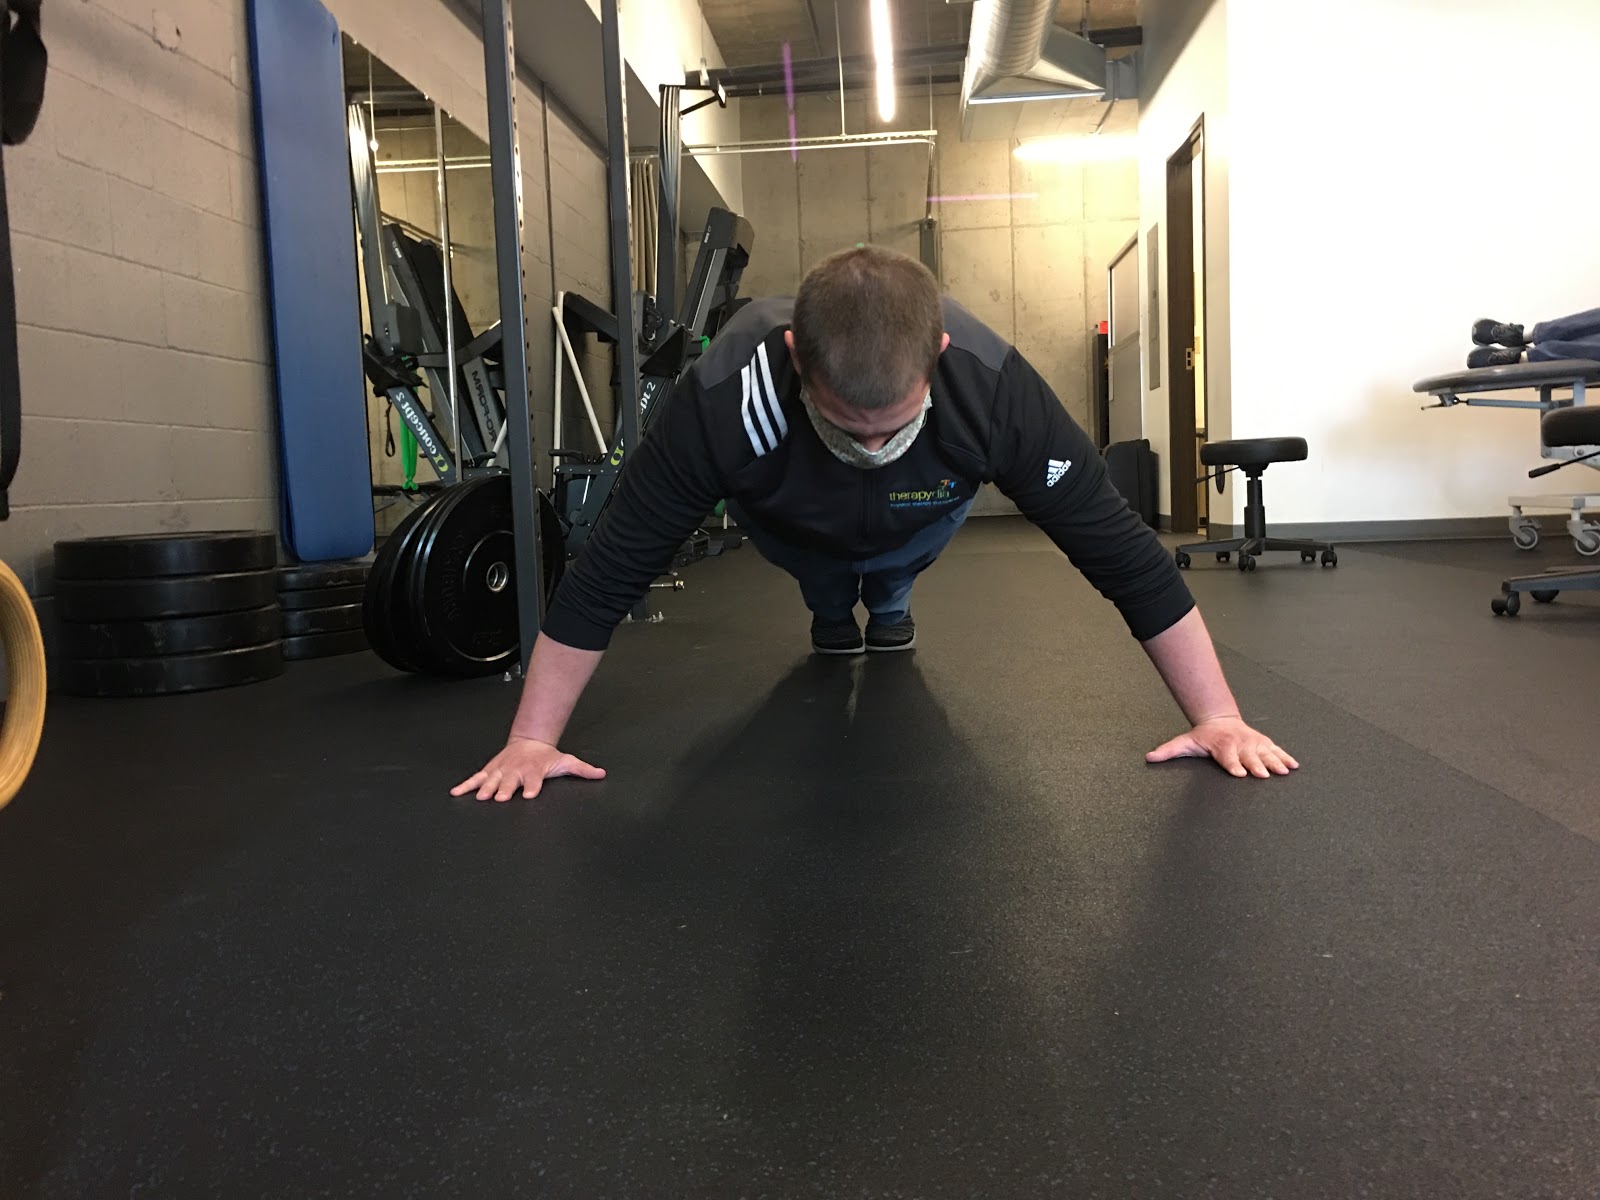
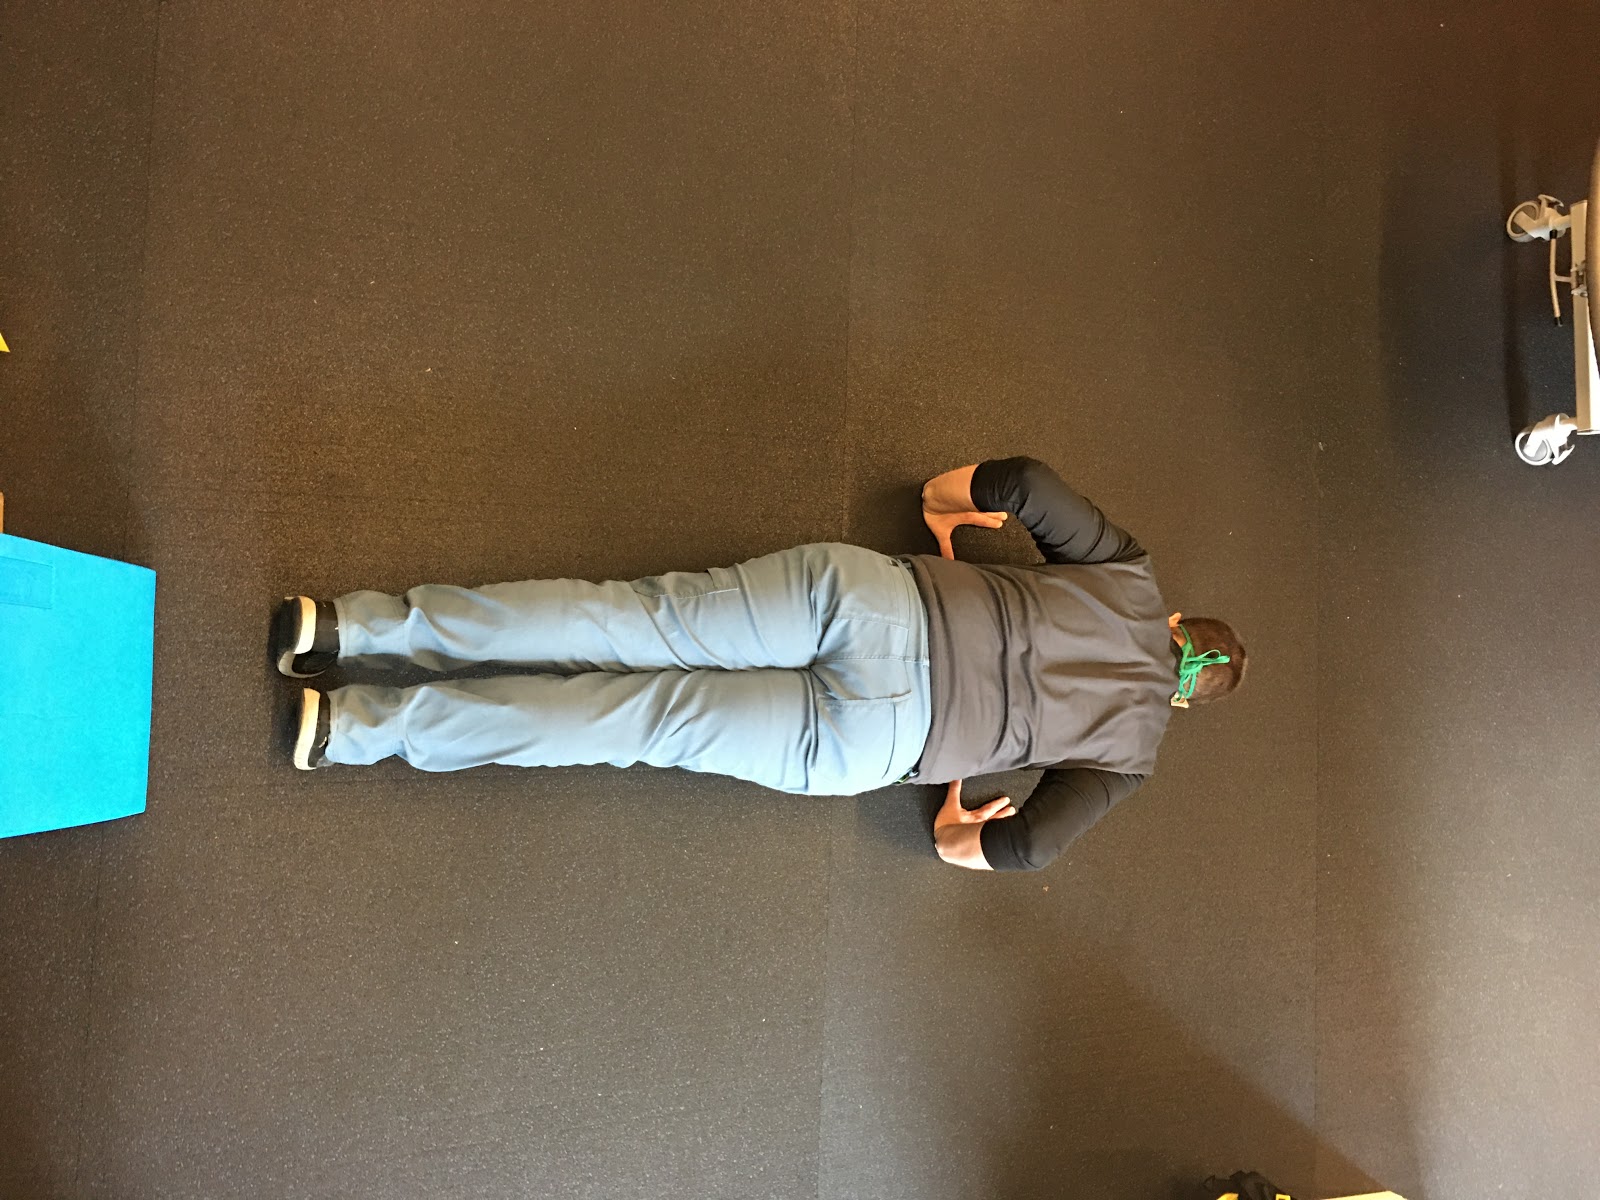
This one is negotiable, but we have to make sure that we’re making a conscious choice, not just allowing the body to pick the course of least resistance. We can bias the push-up towards different muscle groups by changing the position of the hands in relation to the body. Our natural inclination is to choose the position that we’re already strongest in, which is, of course, the opposite of what we should do. The standard starting position for the hands is just wider than shoulder width, with the hands inline with the bottom of the pectoral muscle. If we move the hands wider apart, more load will be placed on the pectoral muscles. If we move them forward or closer together, the triceps have to work harder. Moving the hands down towards the waistline targets the deltoids.
My recommendation is for beginners to start with the basic position and master it before moving into any of the variations. For those out there able to play around with some modifications, always make sure that you’re conscious of which position you’re picking and why.
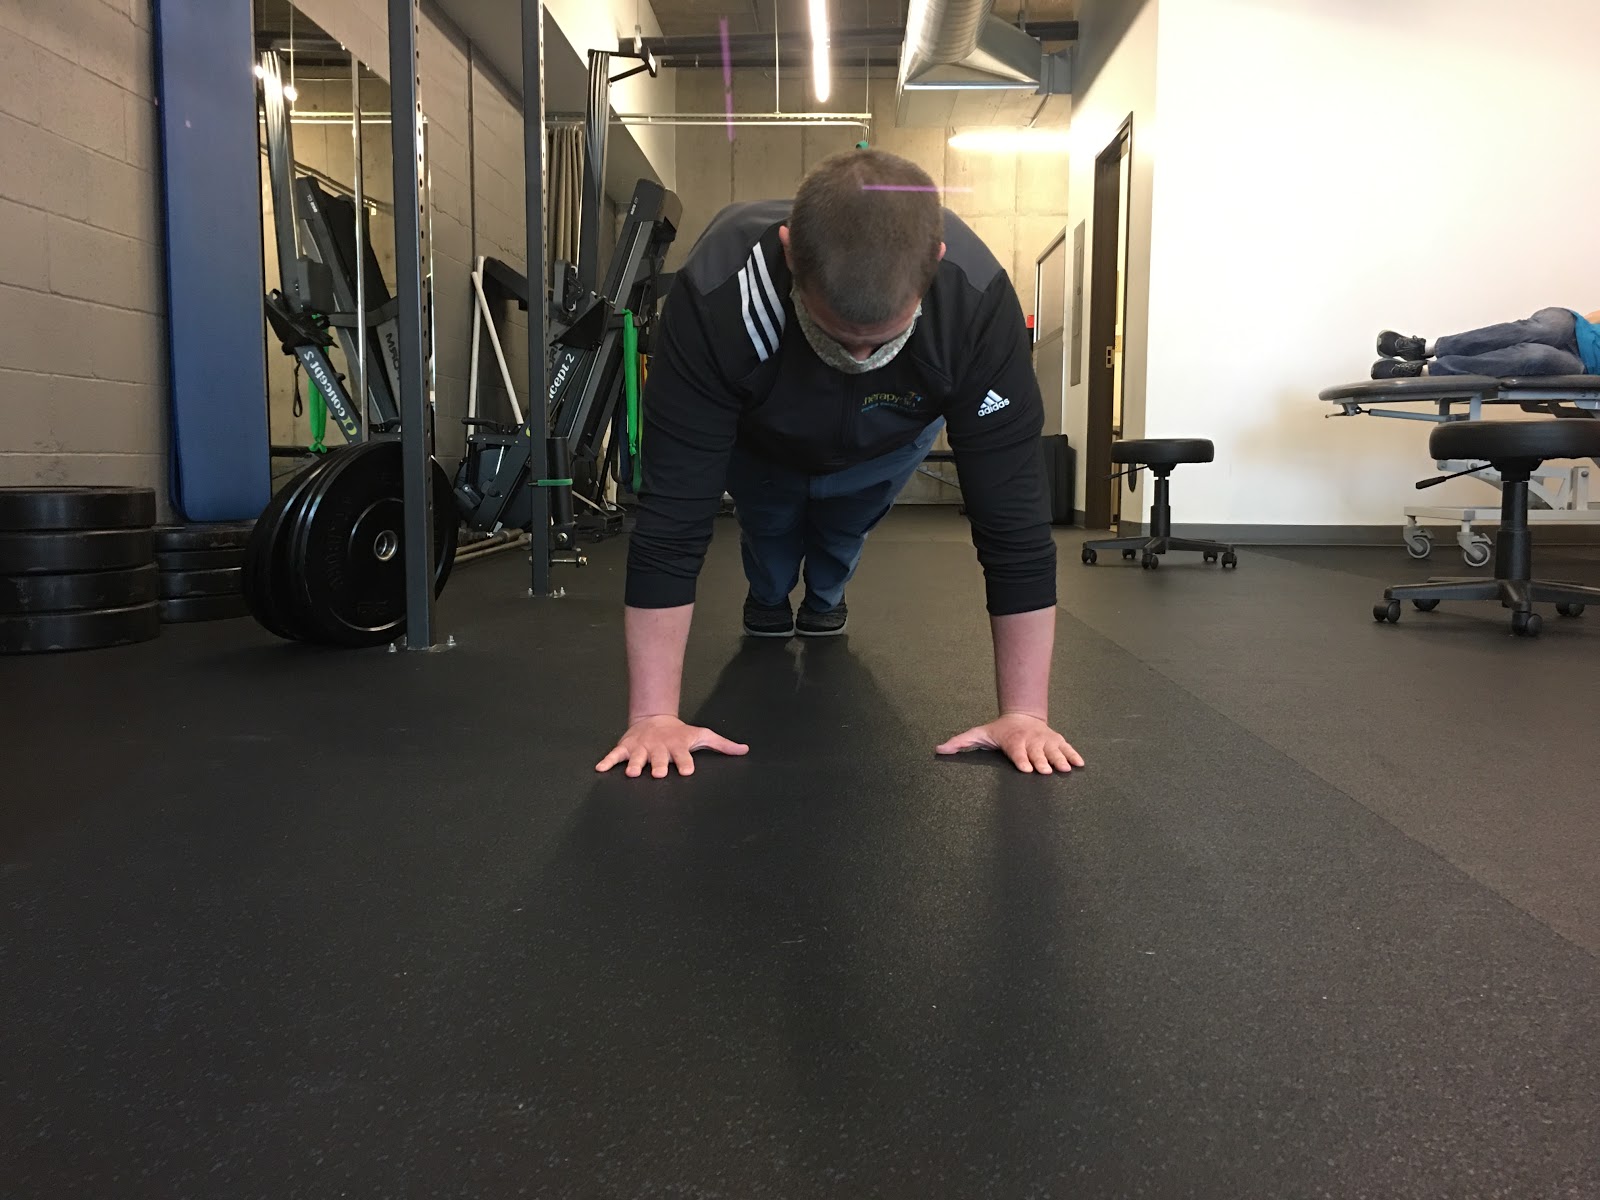
Forearm and Shoulder Position
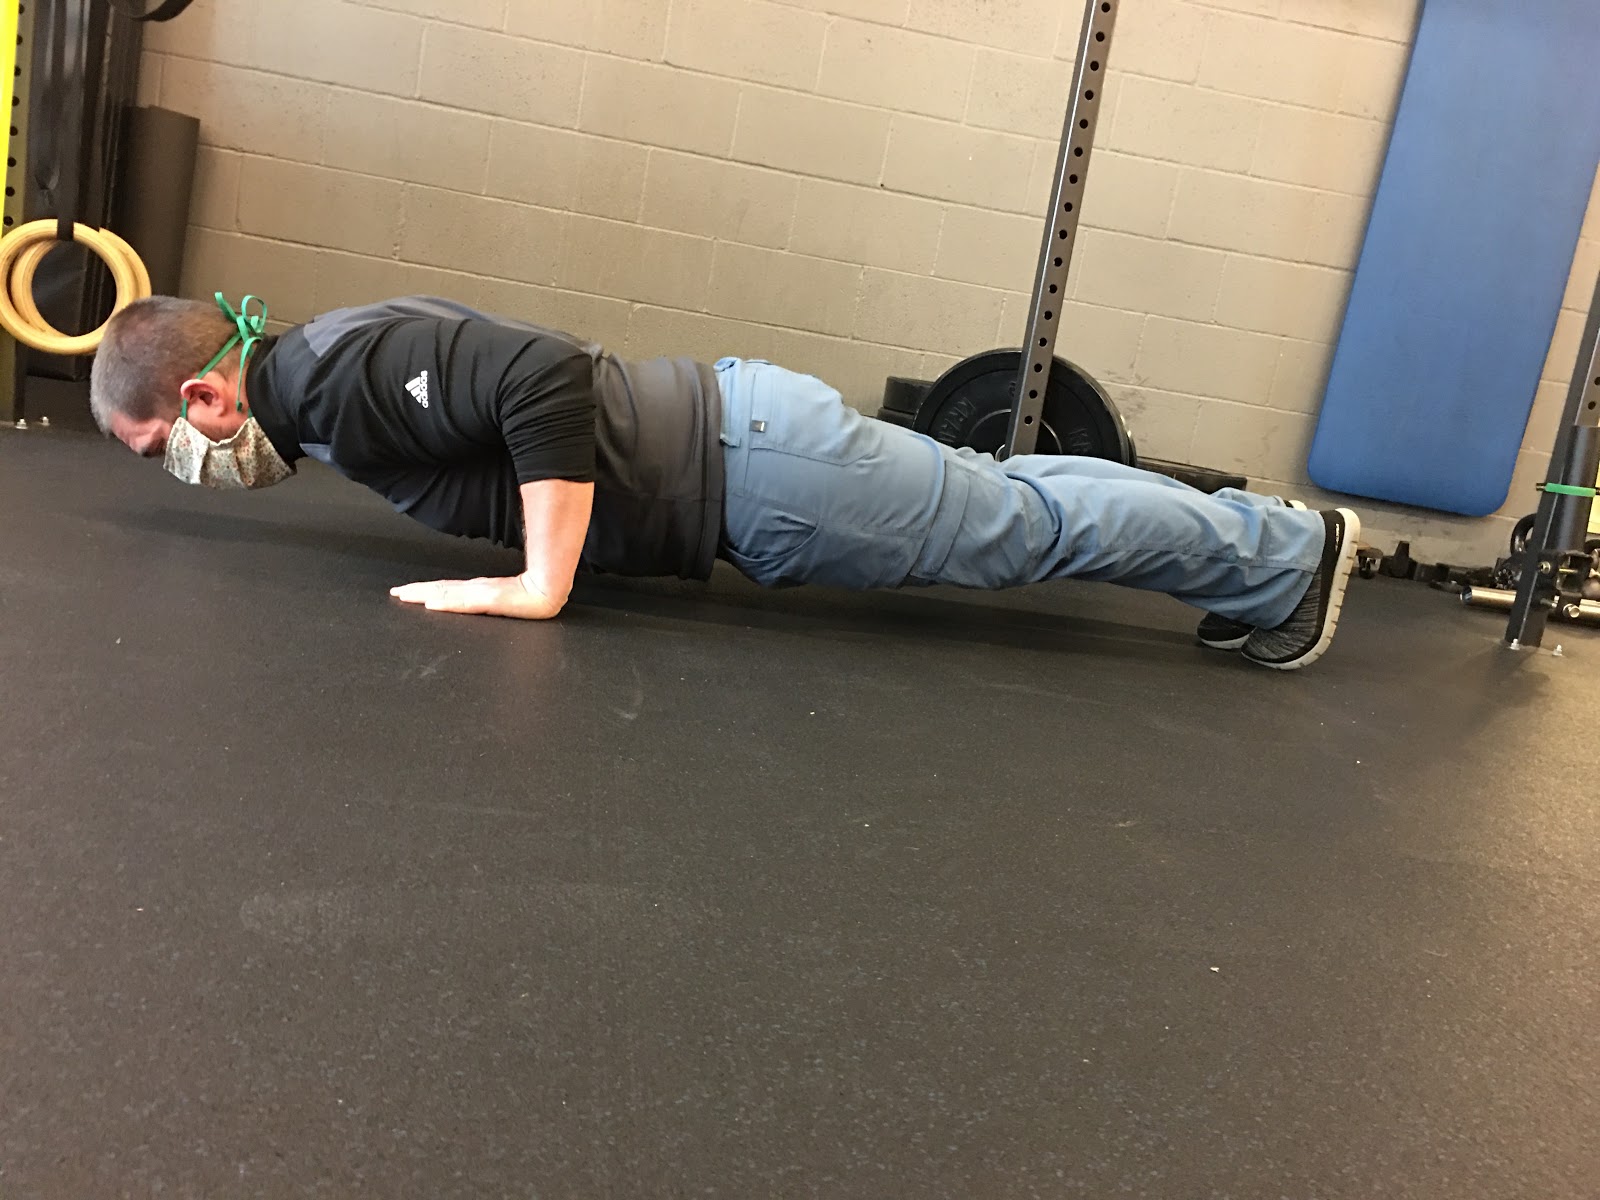
One of the most overlooked cues for the push-up is getting the forearms perpendicular to the ground in the bottom position. This is a simple way to make our pressing more efficient. When our forearms are directed straight into the ground, no energy is wasted, so if we’re pushing into the ground at an angle, we’re making the exercise harder than it has to be. The only challenge here is that we need to think about where we’ll end up in the bottom position of the push-up and most people start from the top. An easy way to figure out where we need to be is to lay face down on the ground and get the hands and forearms set. Then, return to the top position without moving the hands. Once you’re back at the top, you should be set.
Now the hands and forearms are set, we can take a look at the shoulders. This is another area where there’s many correct options. Generally, the arms about 30-45 degrees away from the body is a good place to start for the basic push-up. For different variations your shoulder will be closer or further away from the body, which is great. The only position I’d tread with caution is flaring the elbows out more than 45-60 degrees. This position puts more stress on the shoulders and should be reserved for the well-trained only.
Head and Neck Position
Simple but important. The chin should be gently tucked with the nose and eyes pointed straight down. While it may seem unrelated to the push-up, many of the muscles that stabilize the shoulder blade connect directly to the neck. If the head and neck are not in a good position, those muscles will either be working in a stretched or shortened position, which makes their job harder. This can limit your ability to control the shoulder blade, which limits your pressing power. Be mindful that you’re not looking ahead or towards your feet, or poking the chin out.
Shoulder Blade Position
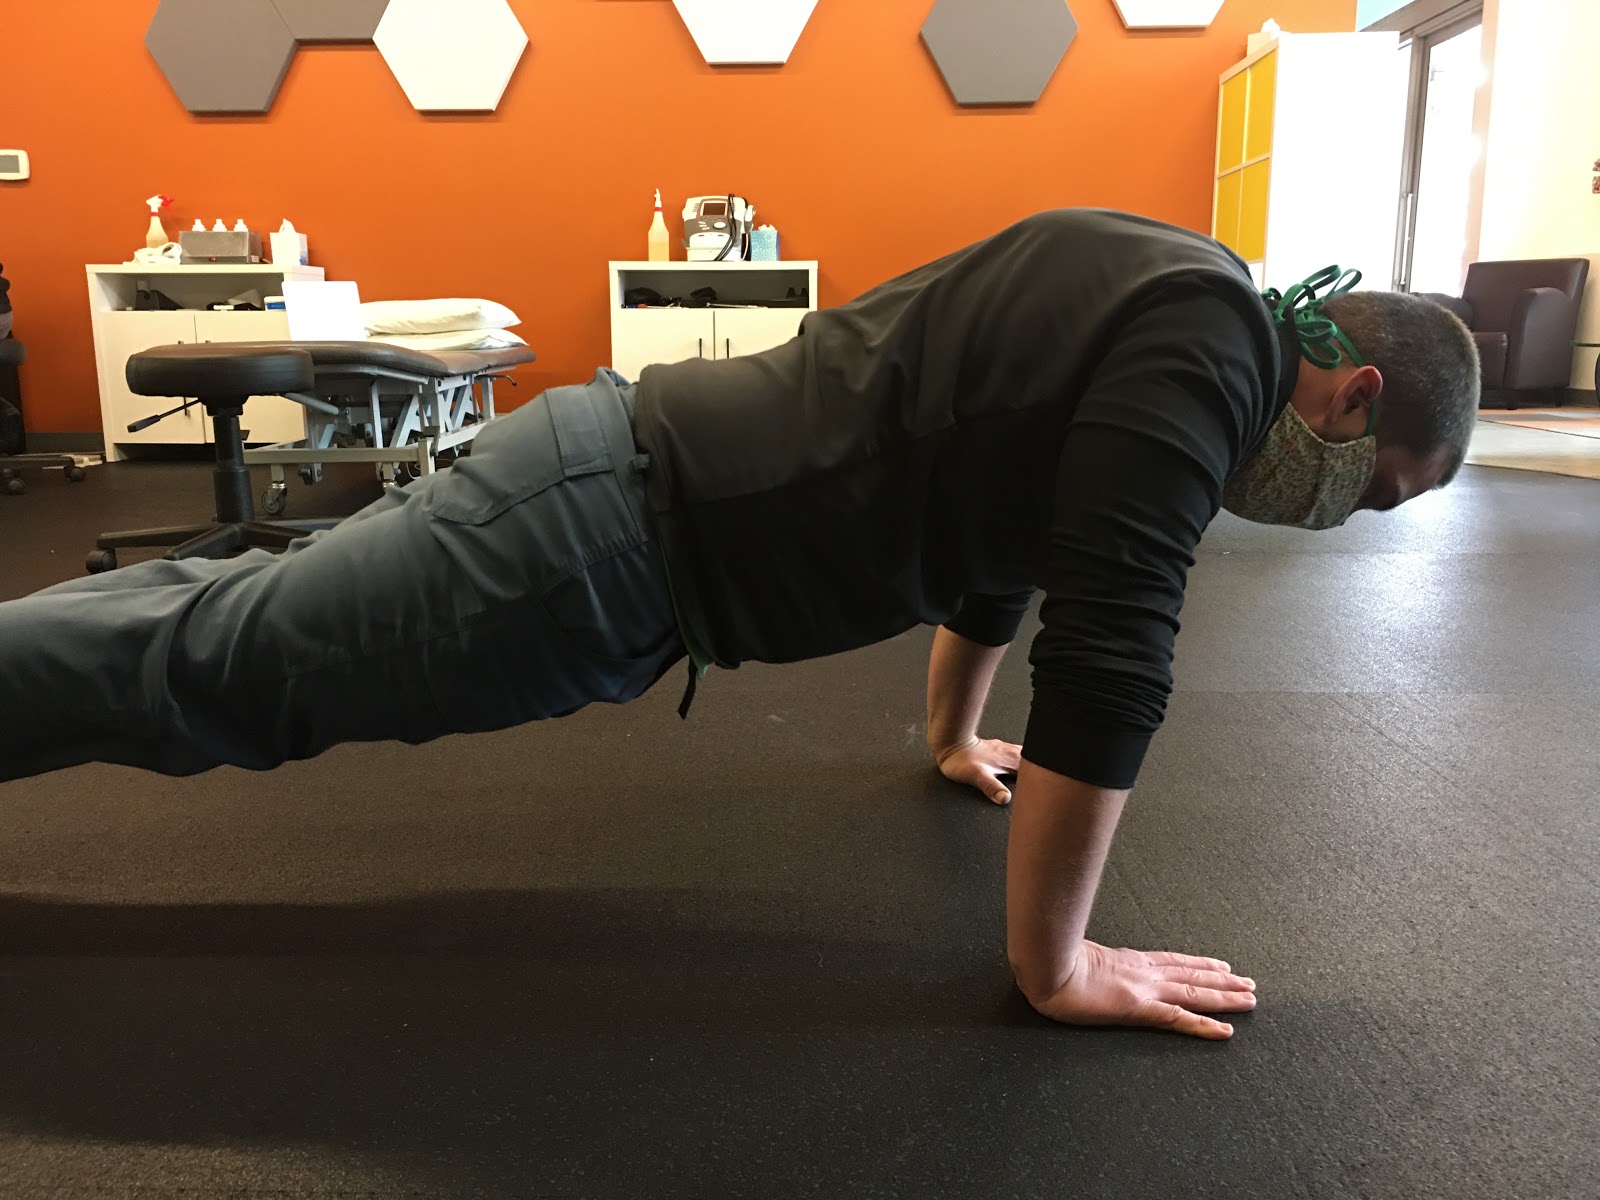
At the top of the push-up, it’s important to push the chest away from the ground, and think about pressing the shoulder blades around the body. This contracts the serratus anterior muscle, which is one of our most important shoulder blade stabilizers. Some people call this extra protraction of the shoulder blade the “push-up plus”. I just consider it part of a well-performed push-up. It’s not a “plus”, it’s mandatory.
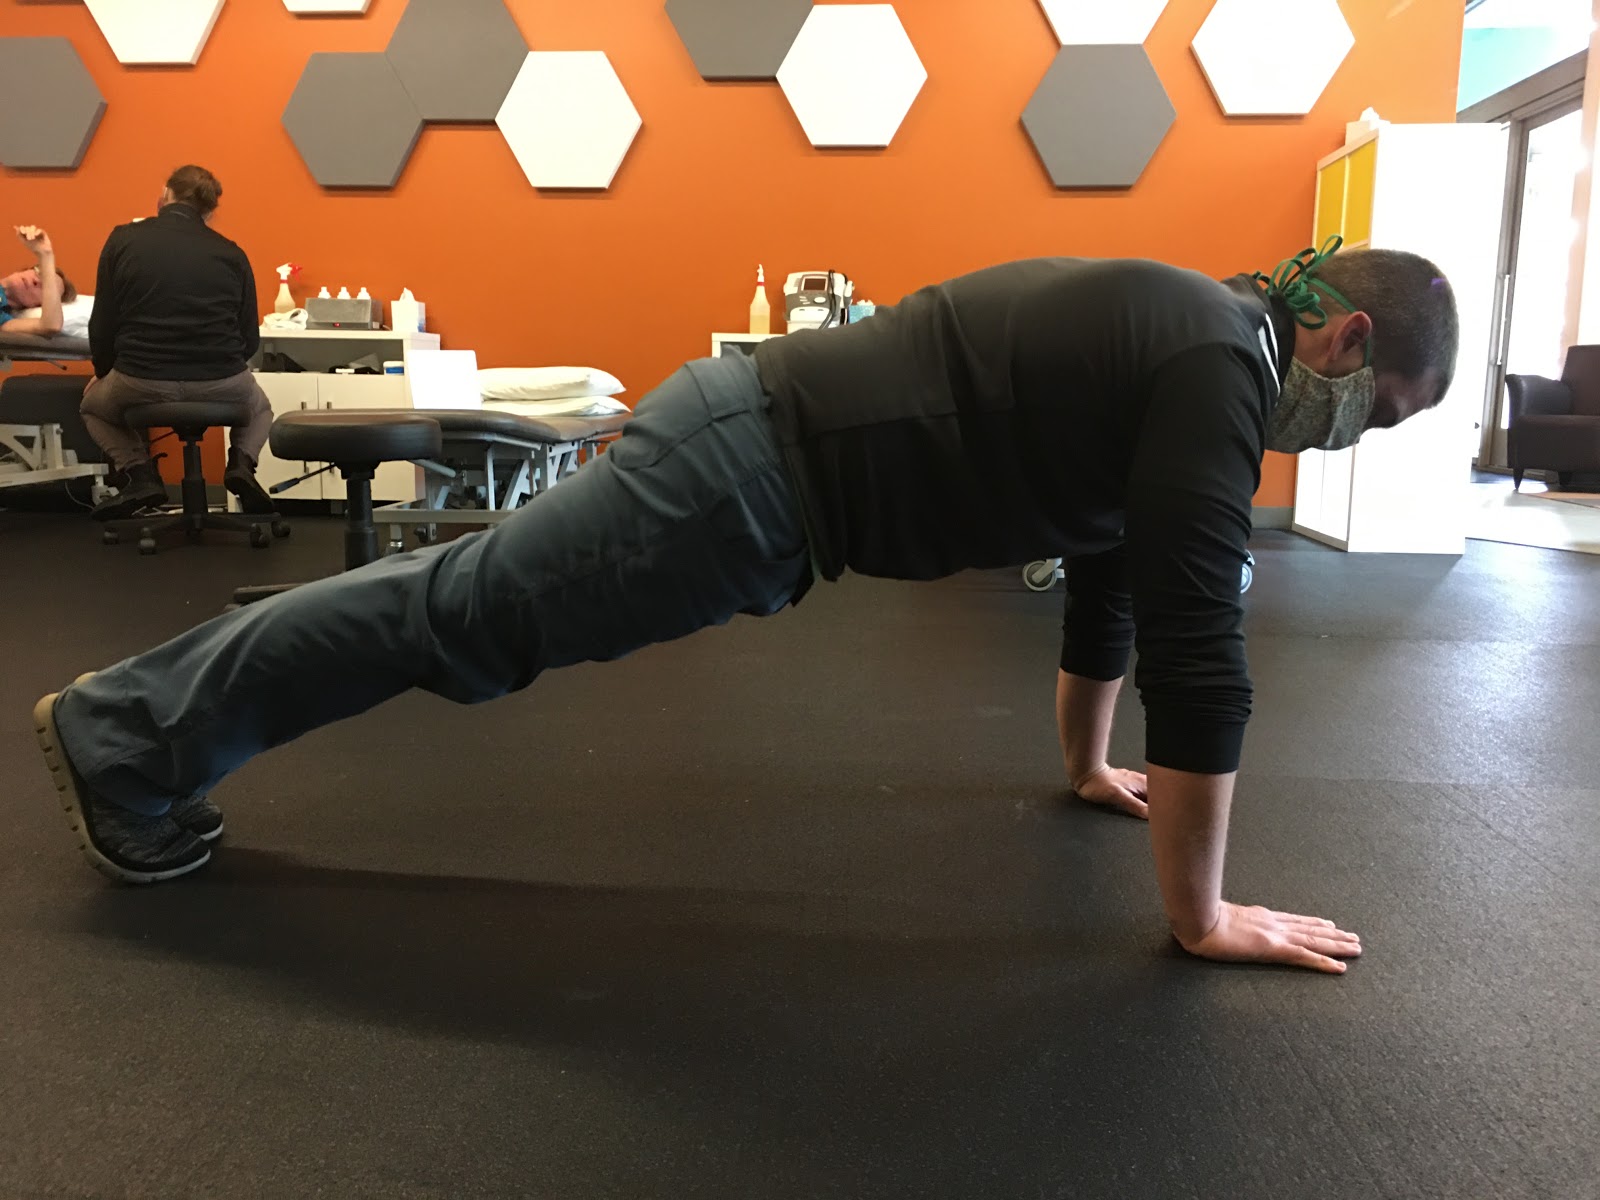
As you move down into the bottom position of the push-up, think about pulling yourself to the ground, and squeezing the shoulder blades down and together as you go. This contracts the middle and lower trapezius muscles, other important stabilizers of the shoulder blades. It’s important to make sure that through the whole motion you’re controlling your shoulder girdle. If we’re not strong through the shoulder blades performing the push-up correctly is going to be very difficult.
If you’re having trouble performing the full pressed out position at the top of the push-up, you can practice that motion separately from the exercise. To do so, get into a good position at the top of the push-up, and then let the chest sag down towards the ground without bending your elbows. From here, press the shoulder blades apart and the chest away from the ground. The elbows should stay fully extended the whole time so that the motion comes just from the shoulder blades. Then let the chest sag back down and repeat the process. Make sure to go slowly to develop control. These are a great way to warm up prior to doing a set of push-ups.
What if I can’t do any push-ups?
So you’re in a good body position with a posterior pelvic tilt. Your hands and forearms are set in just the right position. You’re pressing your chest far away from the ground. Perfect! Then you go to lower yourself and only make it a few inches before your arms give out and you faceplant on the ground. Bummer.
If push-ups are just too hard to start with, the best way to begin is by doing them on an incline. Find a surface about stomach level to start, and get into basically the same position. Body should still be in a good tilt with the butt squeezed tight, hands just wider than shoulder width. The forearms will be tricky since they’re no longer going to be able to go straight down – think about them pushing directly into the surface and you should get pretty close. Perform the push-up exactly as described, but with the body closer to upright to limit the amount of load on the arms. Can you do 12 like that? Great! Find something about 12 inches lower. If you can’t, practice there until you can do 3 sets of 12-15 reps, then move down. Repeat that process at each level until you’re doing push-ups on the ground. Stairs can work well for this, as can a kitchen counter, chair, or Ottoman.

Push-ups have stood the test of time as a fundamental exercise, and they’re an awesome way to build the pressing muscles of the upper body. Hopefully this breakdown will help you to clean up your push-up form and address any weak points that are limiting you. As always, the physical therapists at Therapydia are here to support you in your fitness goals. If you’re struggling to move without pain, we’re here to help.